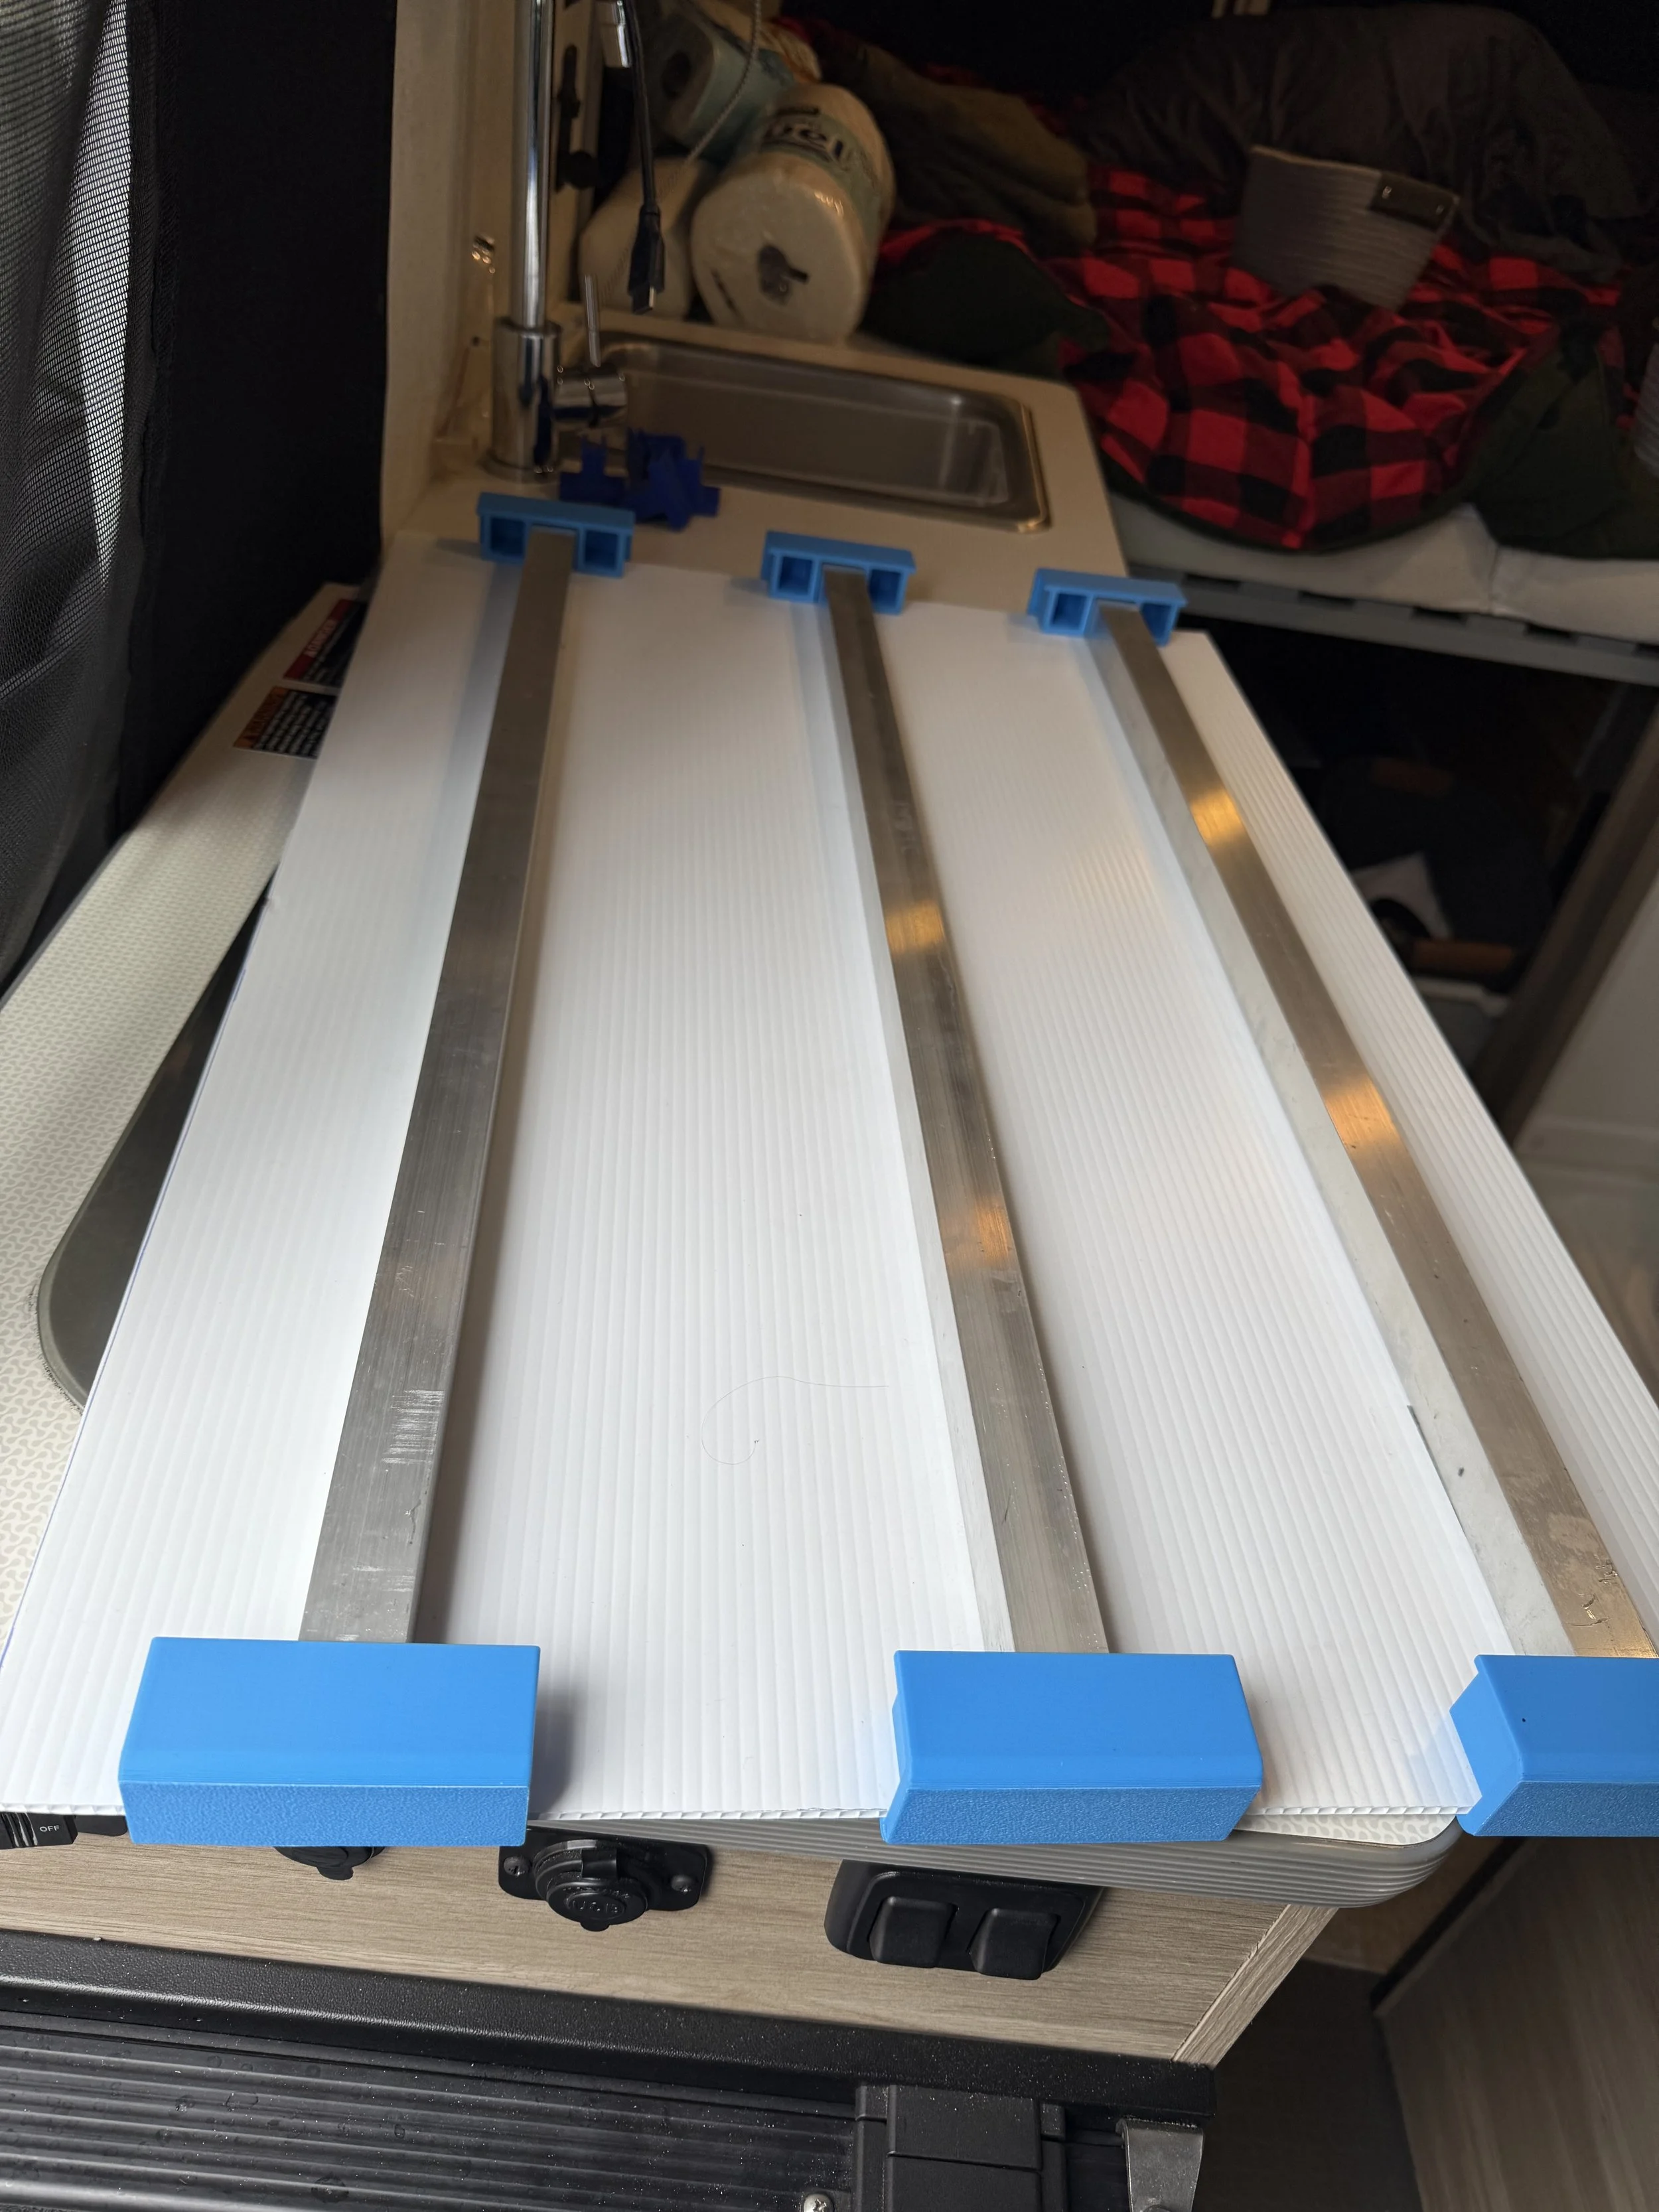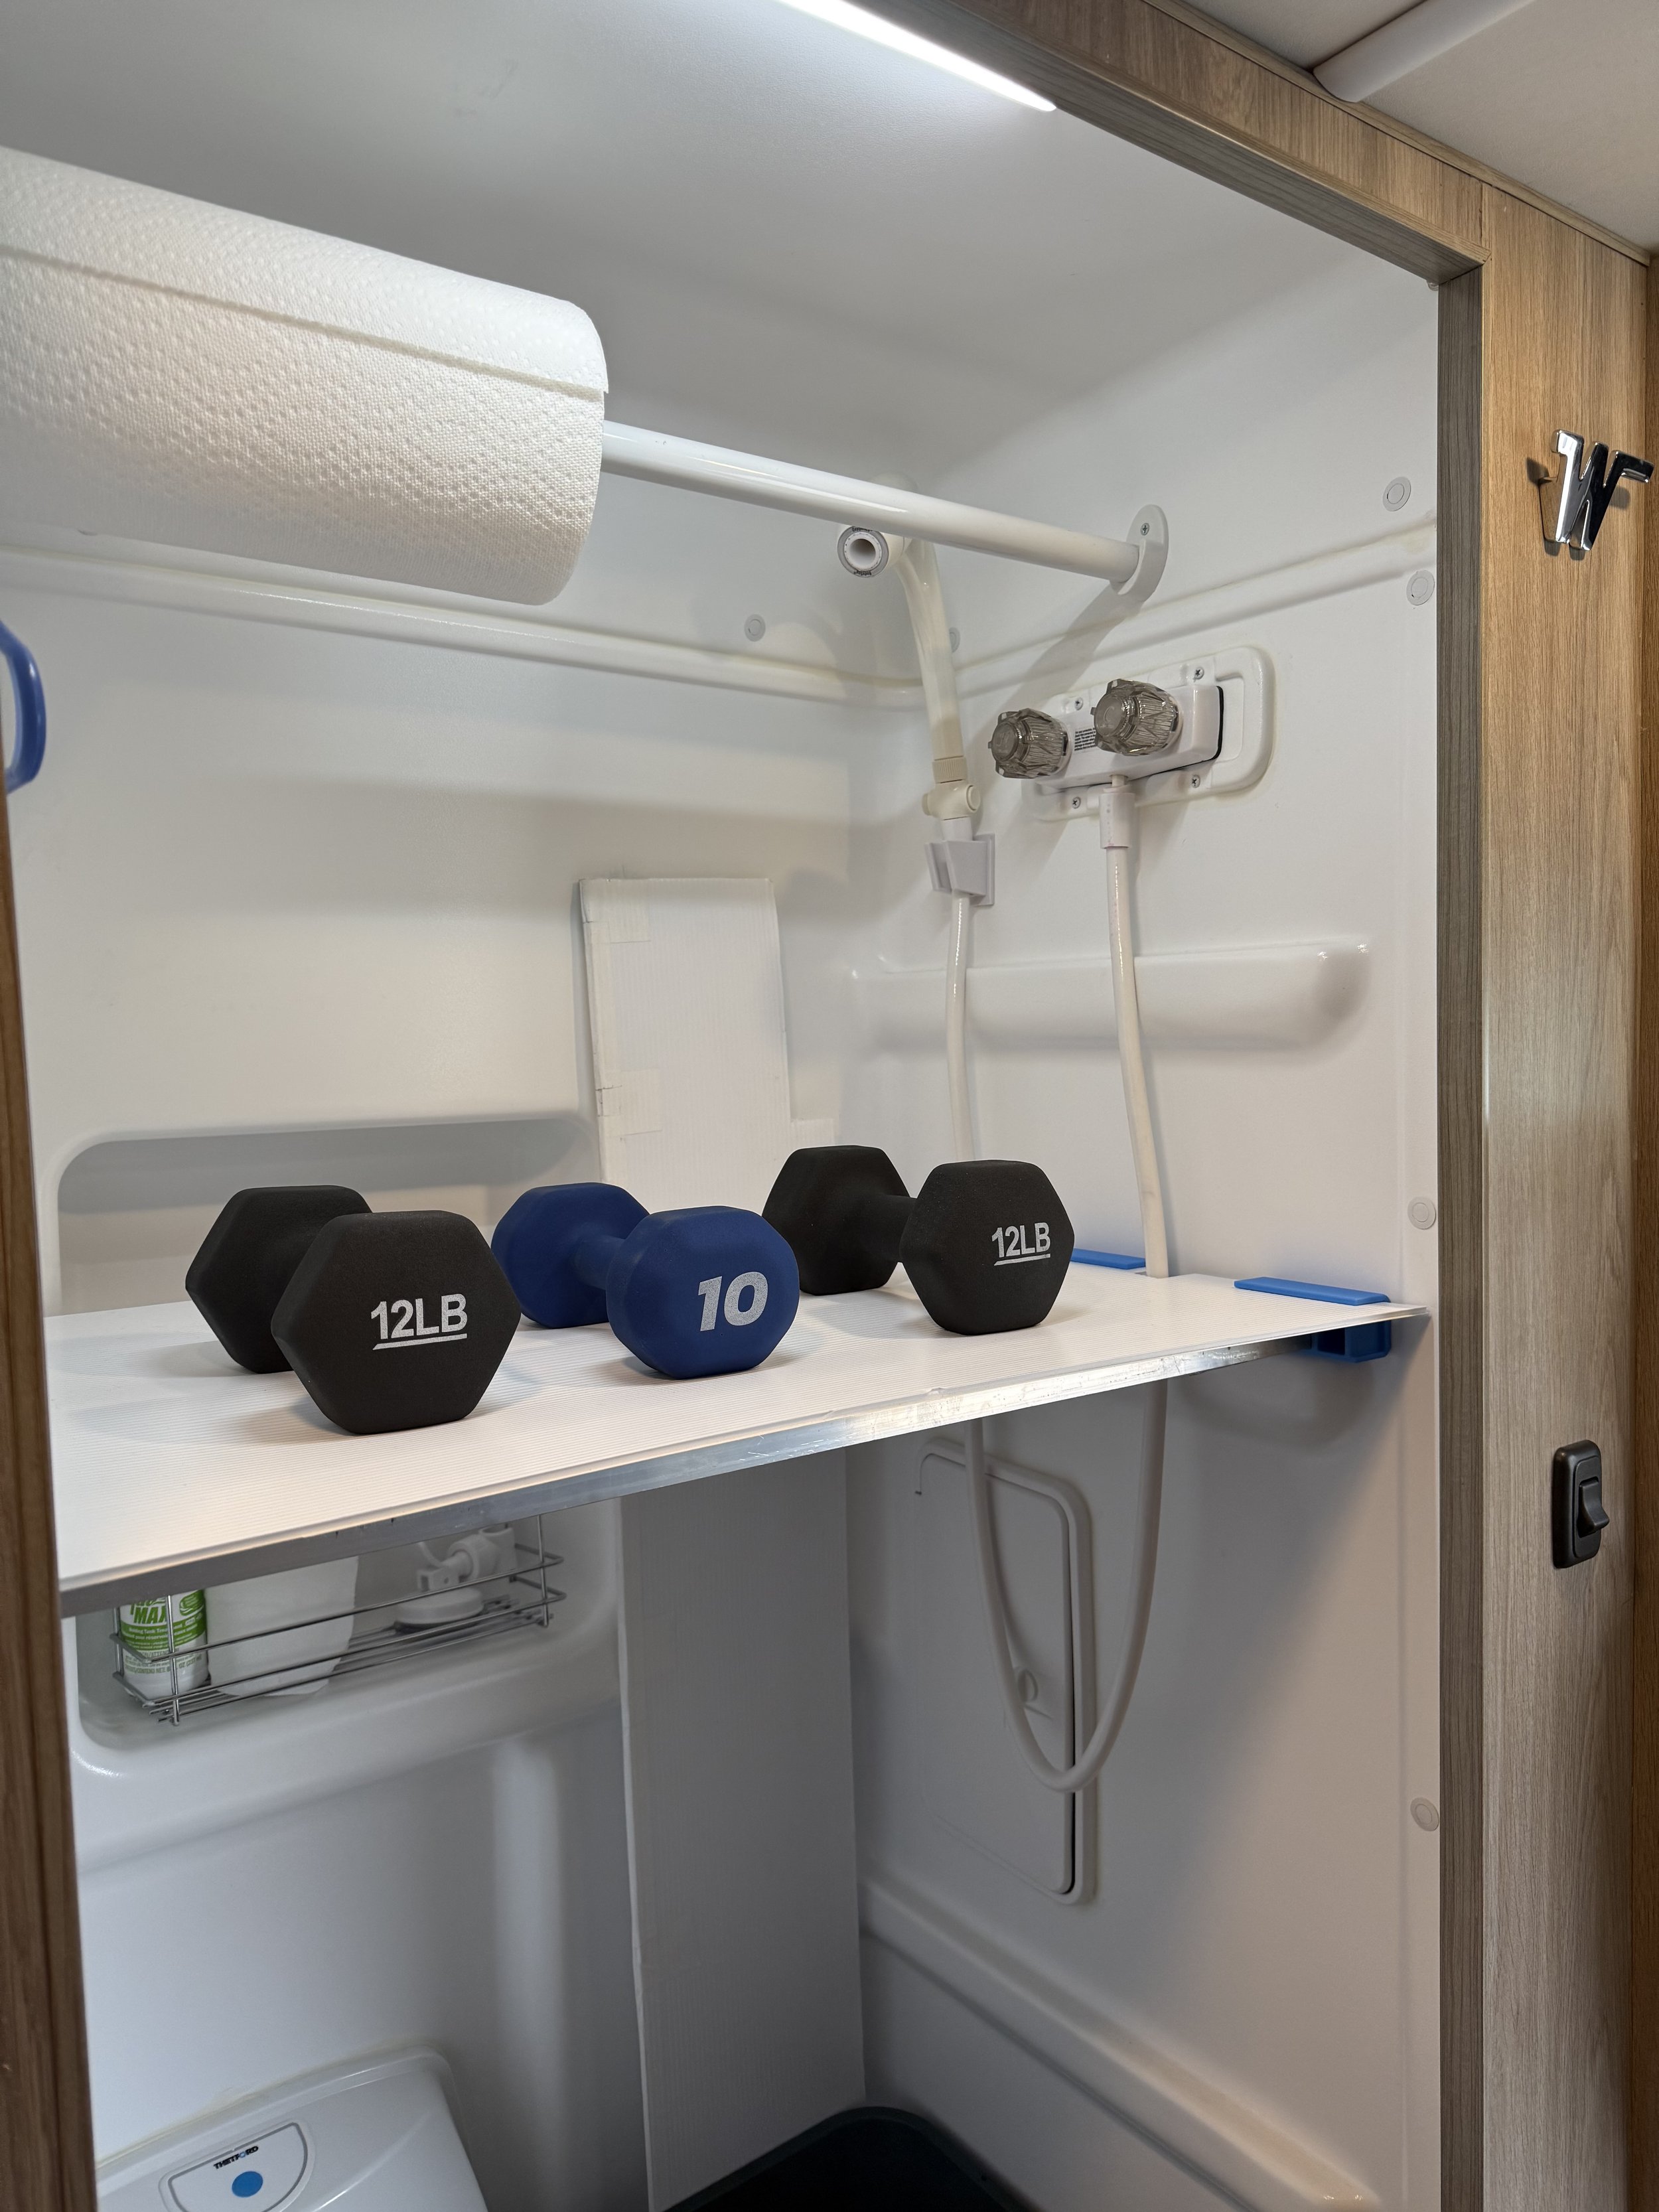
Custom Lightweight Shower Shelves
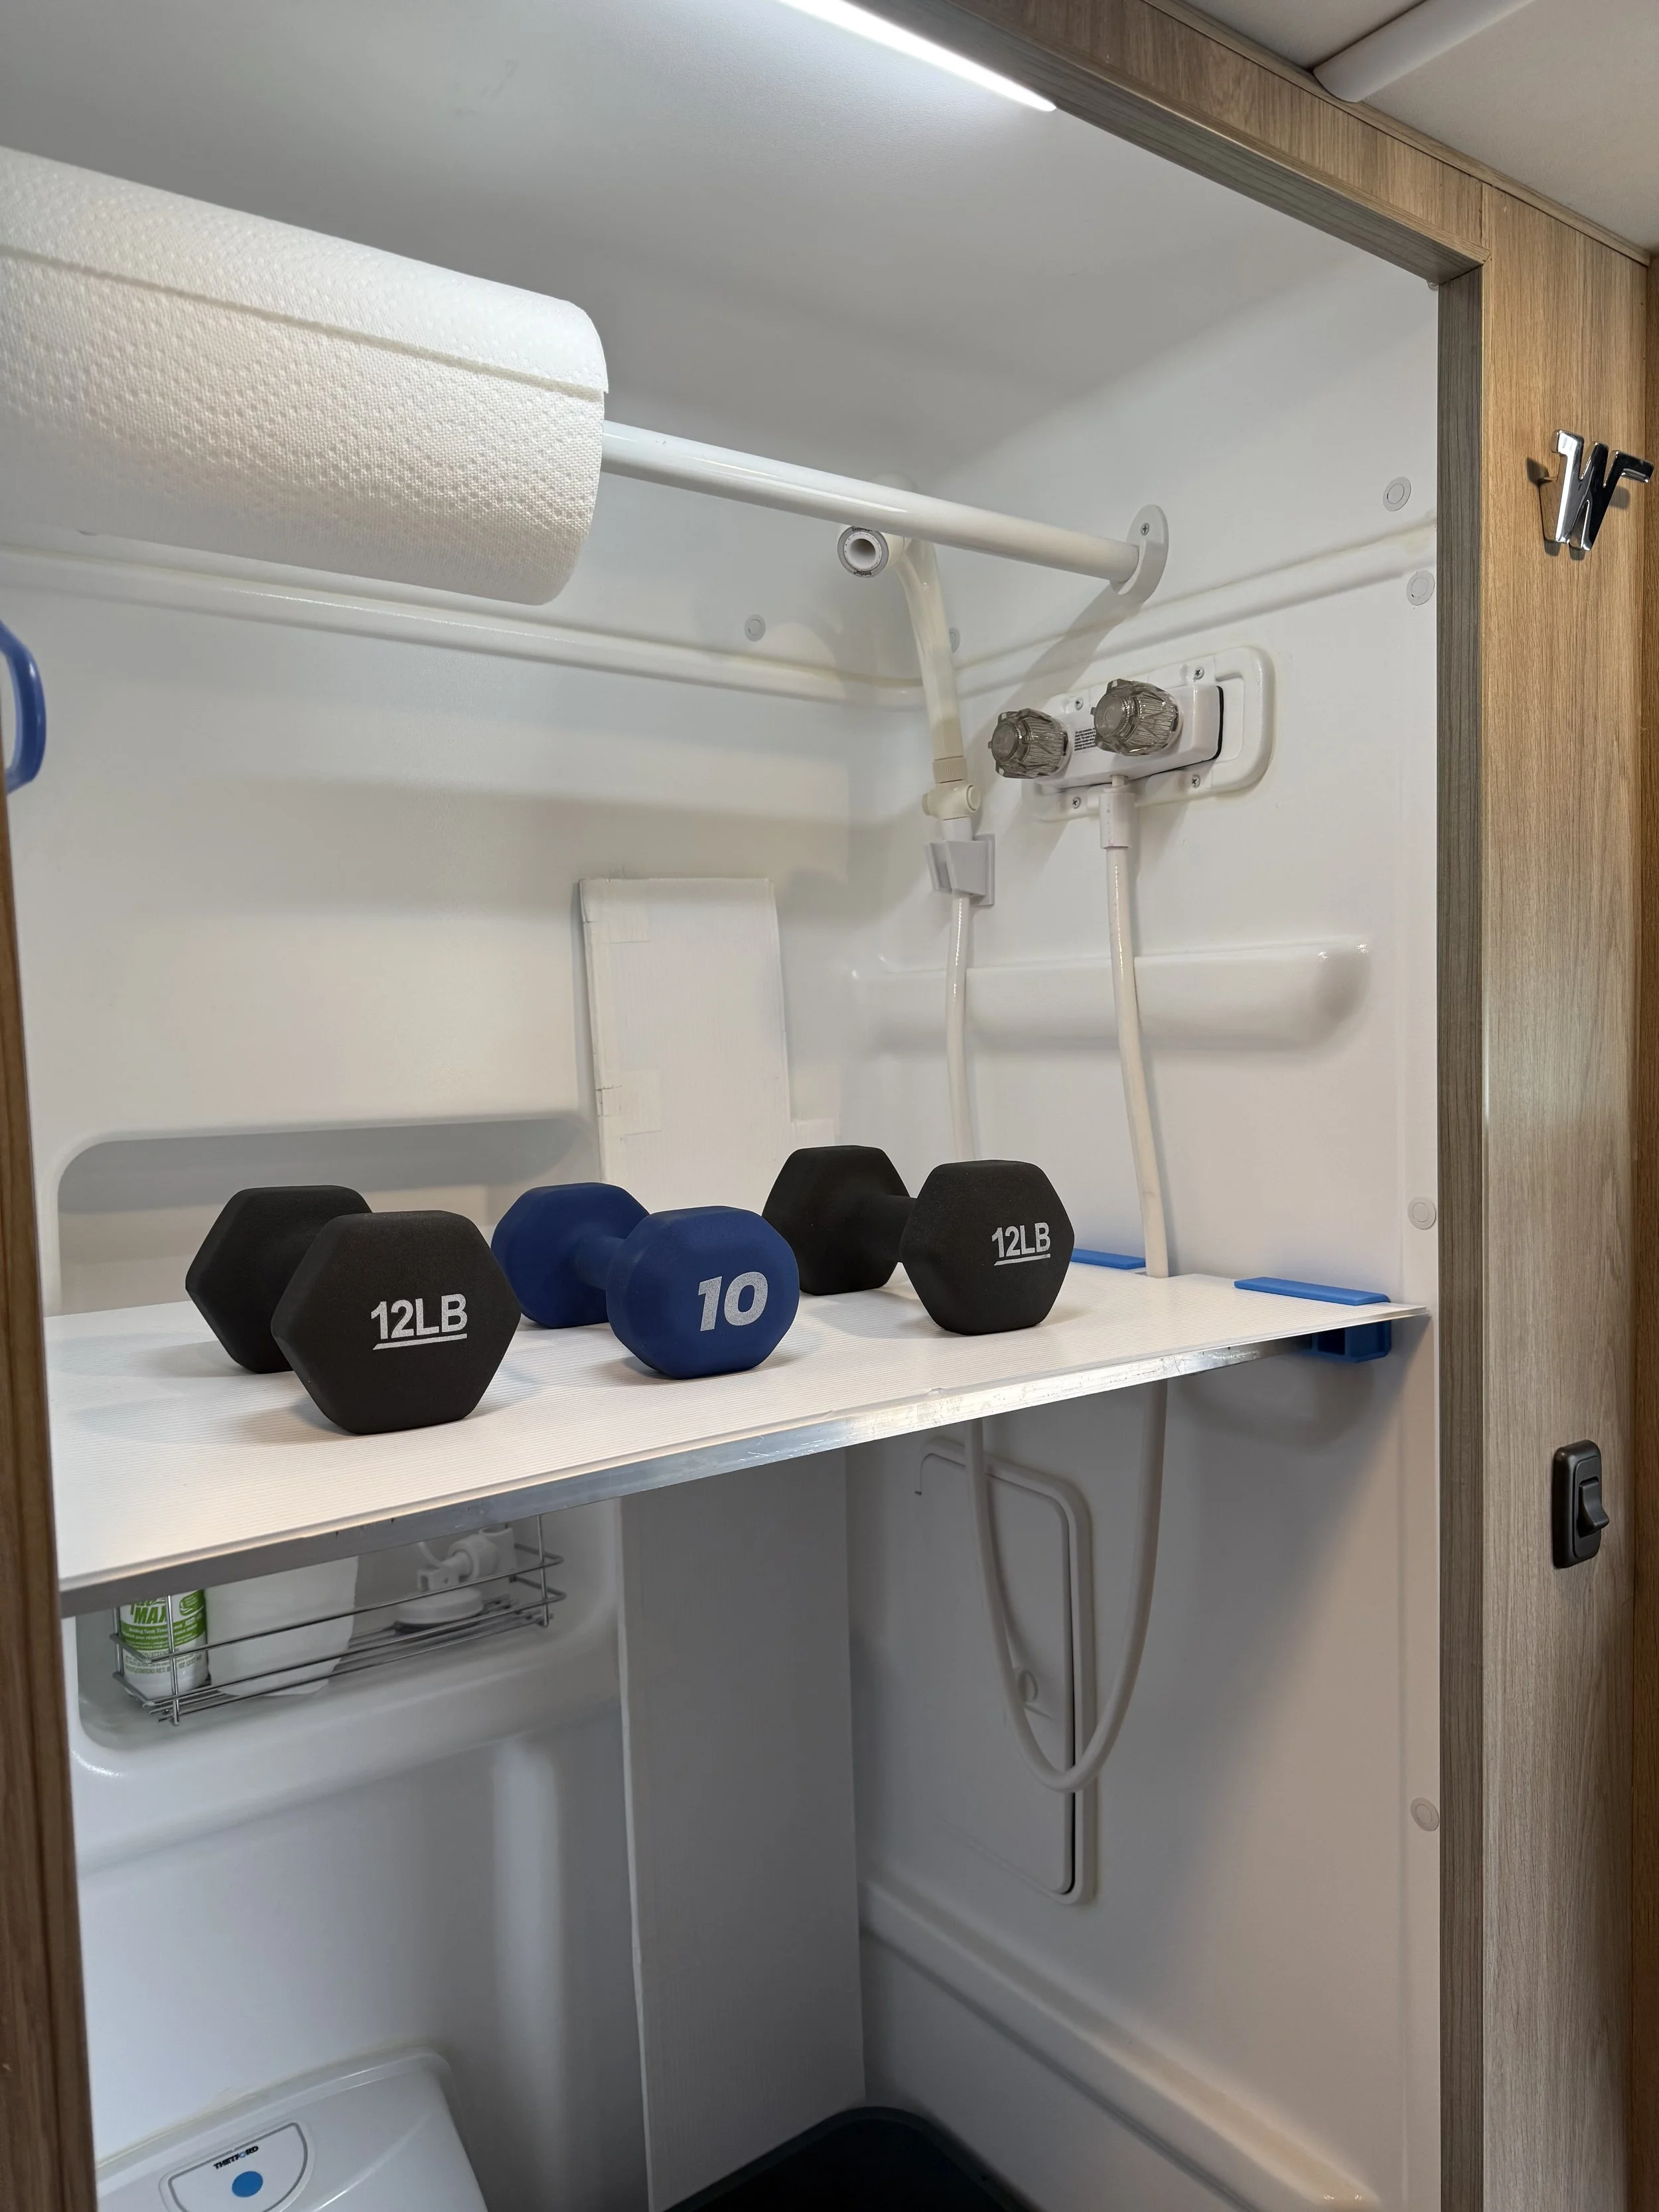
Strong
Light weight
Easily removable
Reduced risk of cracking the shower surround when installed, uninstalled
My journey toward creating functional lightweight shower shelves for my 2023 Winnebago Solis 59PX was not straight forward.
I inquired about shelf supports from the camper manufacturer and found that they were extremely expensive. I decided to try to make my own.
Initially I modified some wooden bambu shower mats that I bought off Amazon but I found it to be very risky to handle them. The wooden mats that I bought off Amazon were very heavy. I decided that if I dropped one of them they would likely puncture the floor of the shower surround.
My custom wooden mats also had another problem. The ends of the wooden shelves needed to sit perfectly flat on the horizontal portion of the narrow plastic shelf supports. This was difficult to accomplish. If the shelf was just a little too wide it became wedged and could not sit flush on the supports. If the shelf was too narrow, the shelves could come loose.
I did not want to have to worry about damaging my surround when I inserted and removed the shelves and I did not want to risk the shelves breaking my surround due to them bouncing around when traveling on bumpy roads.
Rather than looking at existing approaches I decided to take a fresh look at the problem. I started by writing down requirements for my shelves and then decided how I could design the shelves to achieve my goals
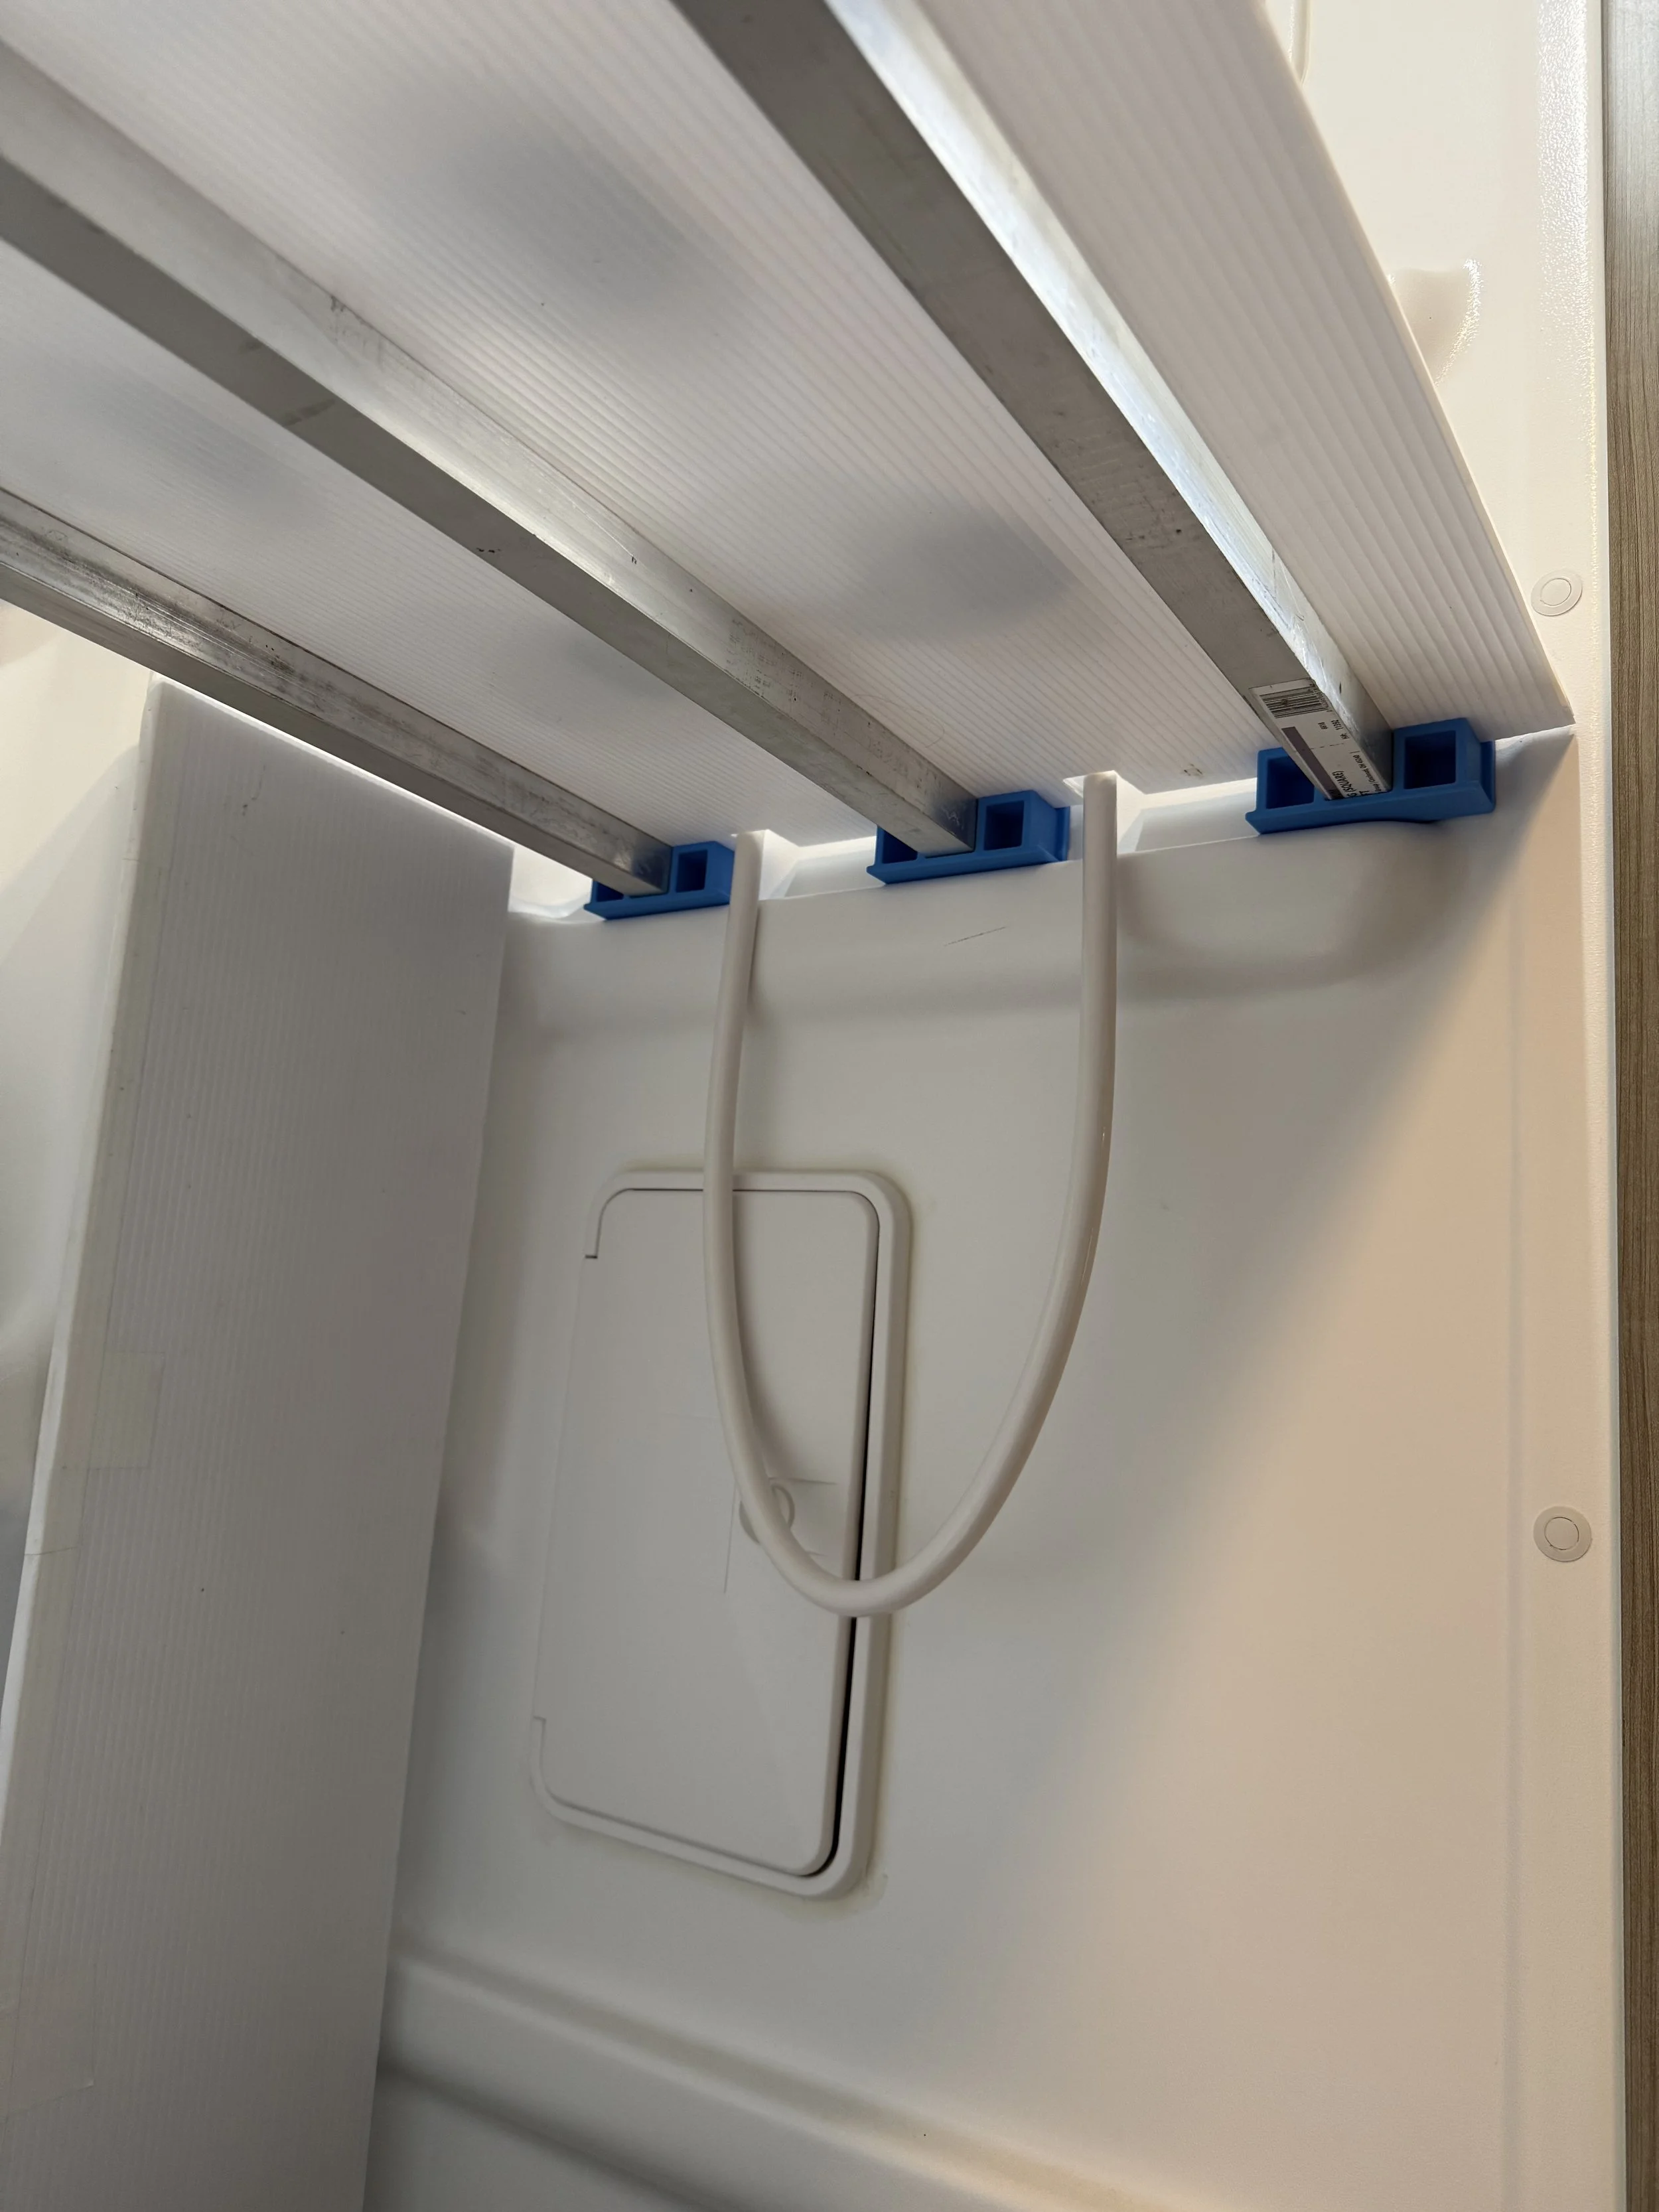
I wanted them to be strong. I decided to use 3/4” aluminum square tubing for the support.
I wanted them to be lightweight. I chose to use plastic cardboard for the horizontal surface
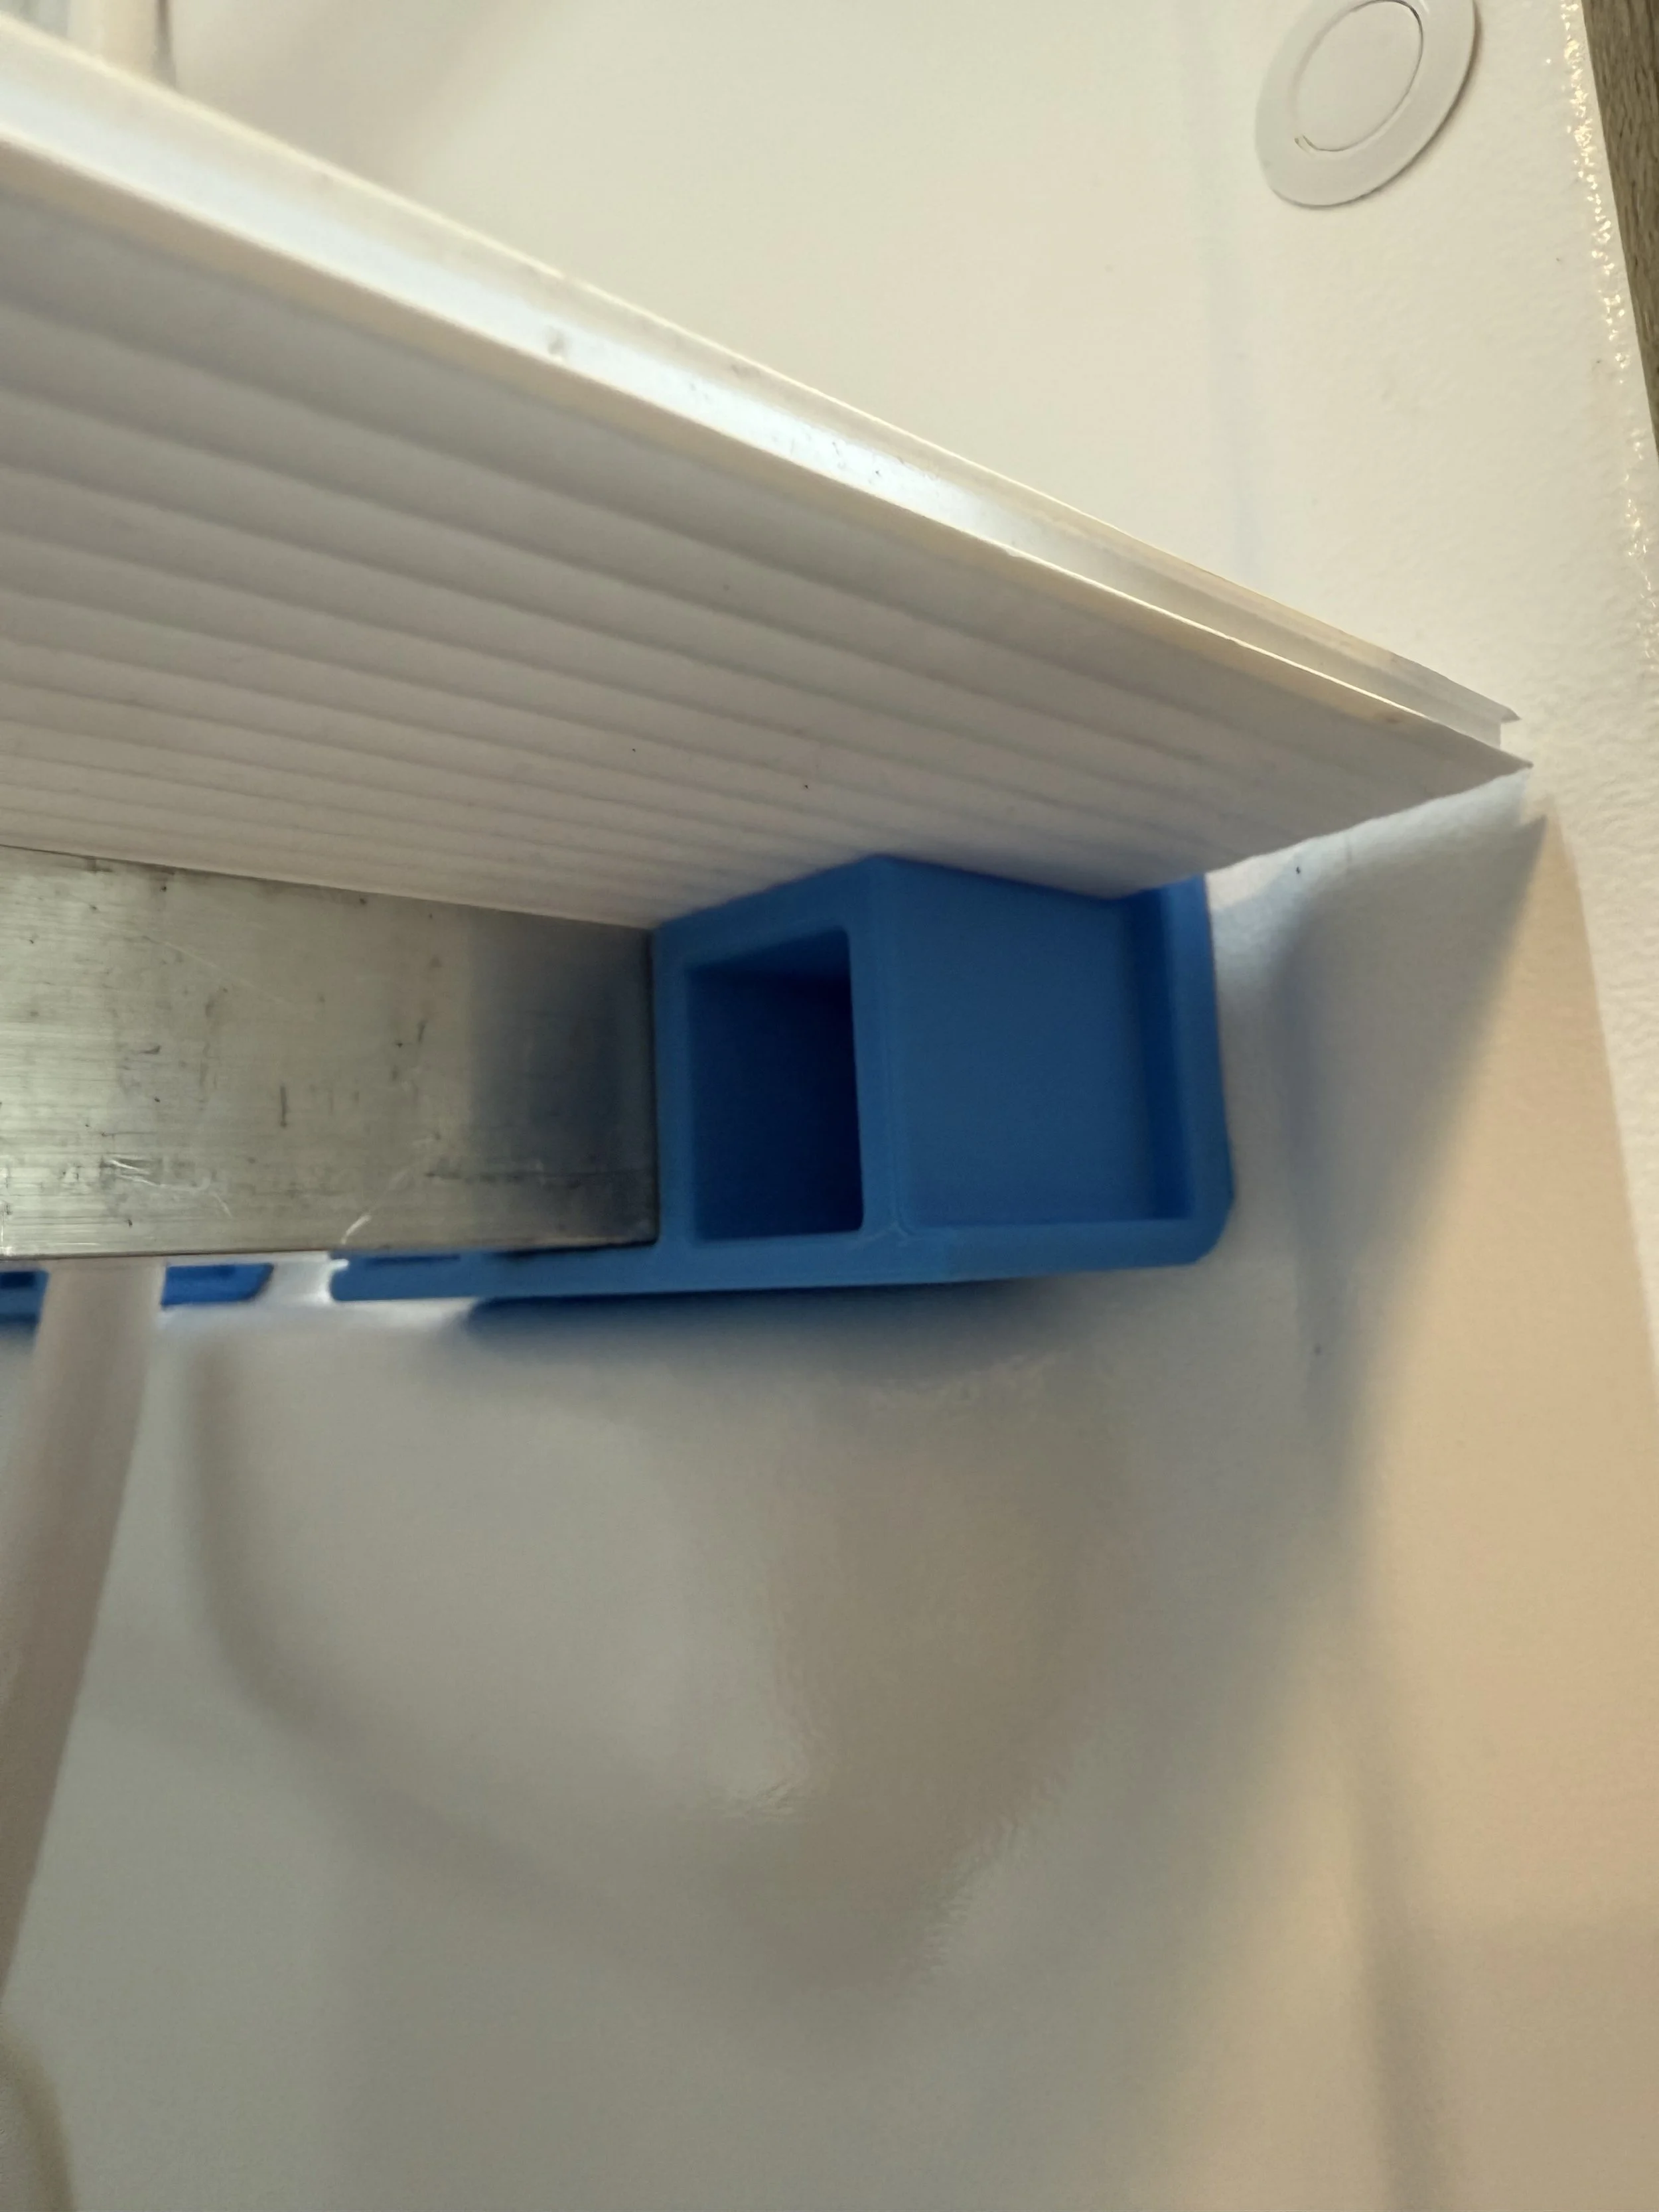
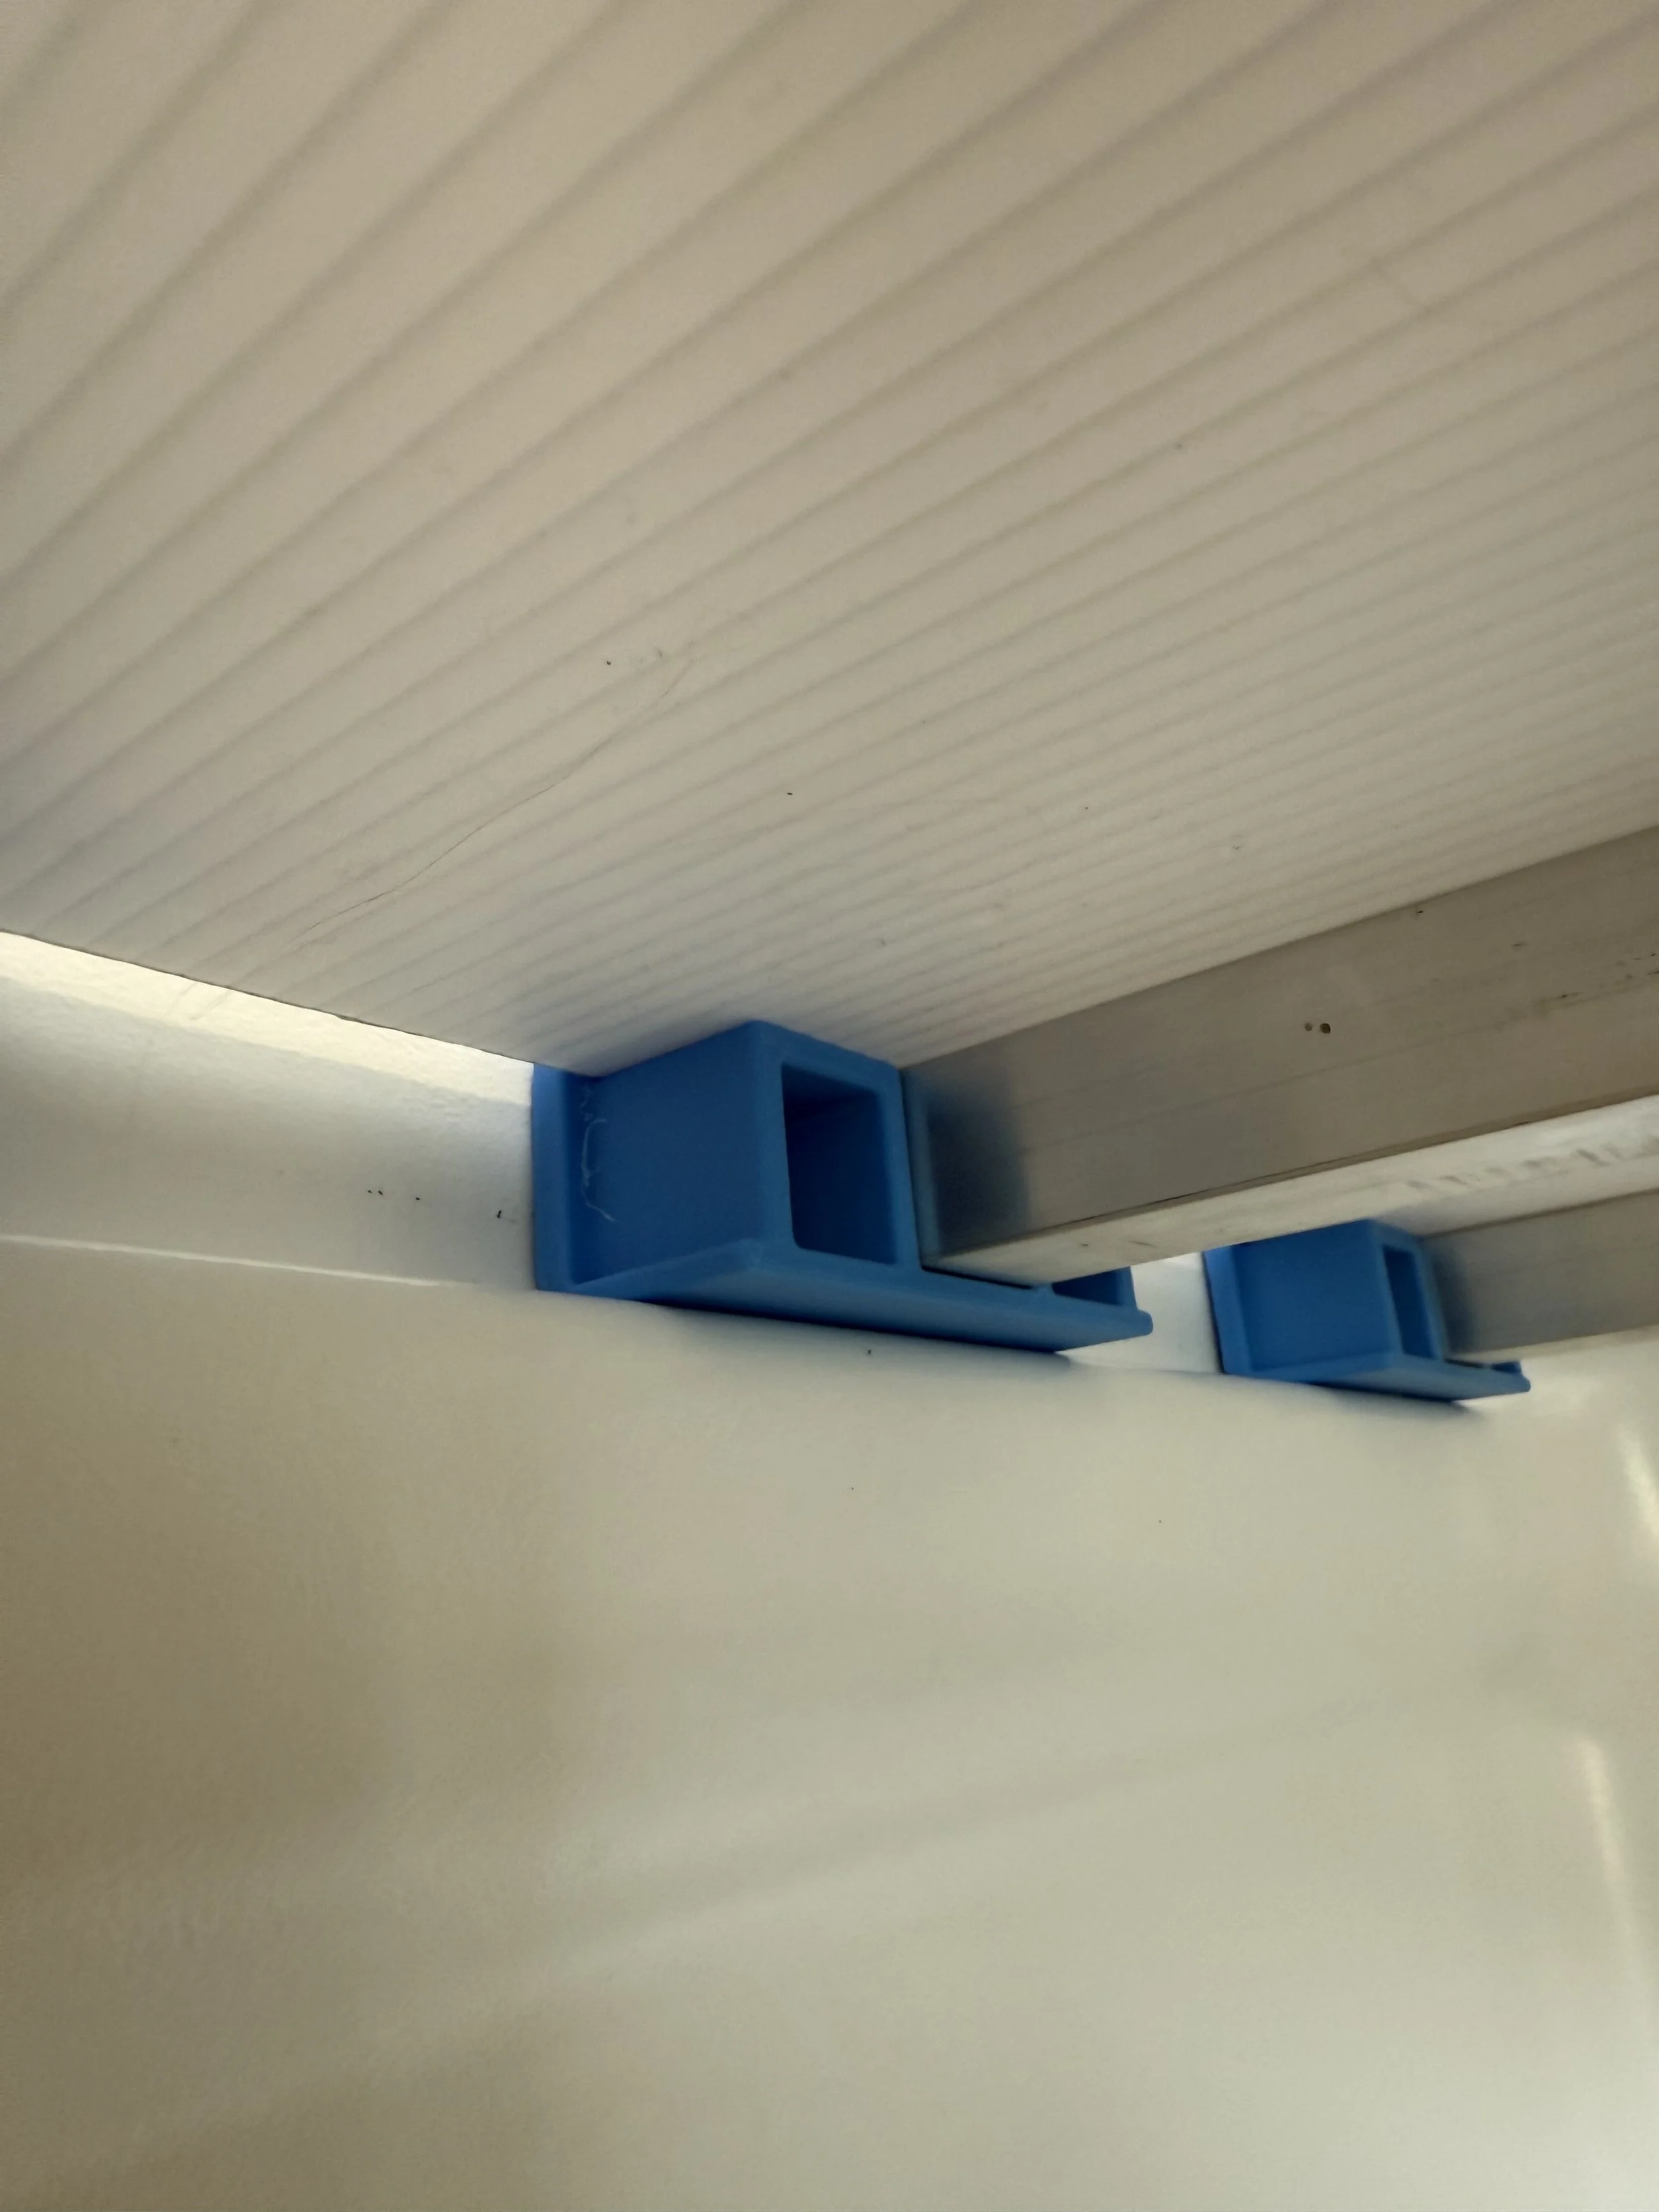
I wanted to do whatever I could to distribute weight and minimize the chance of cracking the surround. I decided to design and 3D print custom plastic pieces that would mate well with the shelf supports.
I wanted them to be easily removable.
My current iteration of the shelving has been working great.
To install:
I cut the aluminum tubing to length. The width of the surround varies so I measure at each location I want to add a support. I cut the aluminum tubing using a hacksaw and a miter box leaving enough room to insert the custom 3D printed end caps over the ends of the square tubing. I loosely assemble the caps onto the end of the square tubing and check the fit. The square tubing with the end caps needs to be able to sit squarely on the shelf supports and span across the surround WITHOUT THE BRACES BINDING or BECOMING WEDGED.
I lightly push the end-caps outward against the wall of the surround and mark one of the end caps locations on the square tubing. I take out the loosely assembled shelf support and attach the plastic endcap to the end that I marked with a screw. I repeat the process for the other end ensuring that the remaining plastic endcap can be installed without the brace binding or becoming wedged. I shorten the aluminum tubing if necessary so that the assembly does not bind. I mark the position of the remaining cap, remove and install it. If it is not perfect I can disassemble and repeat the process. I can rotate the square tubing to get to a fresh surface.
I create 3 supports for each shelf. After the supports are assembled I cut a piece of Coroplast and insert it into the tabs in the custom plastic end-caps. I create cutouts so that the hose hangs naturally.
I use duct tape to keep the end caps in place.